Showing posts with label American Revolution in Europe. Show all posts

Sunday, January 7, 2024

ARP294 Dogger Bank

We last looked at the situation in Europe back in Episode 275, when Britain declared war on the Dutch Republic in December of 1780.

Battle of Dogger Bank
The Dutch were not looking for war with the British.  They had nothing like the military that they had a century earlier.  Dutch officials mostly just wanted to trade and make money, but they were willing to do this with Britain’s enemies.  This included selling arms to the rebels in America, as well as trading with France.  That is why Britain declared war.

When the war began, the Dutch Navy consisted of only 20 ships of the line.  Although they had begun a massive ship building effort before the war began, most of those ships were not yet ready to sail.  Things actually got worse when the British attacked a small Dutch convoy in the West Indies in February 1781.  Dutch Admiral Willem Krull was killed in the action while trying to buy time for the merchant fleet to escape the British.

Even for the ships they had, the Dutch had trouble obtaining crews for them.  Most able seamen worked on better paying merchant ships, or had taken work on one of the many privateer vessels operating in the area.  Since the government did not forcibly impress sailors like Britain did, it had great trouble recruiting enough men to sail their ships.  The result of all this was that most of the small Dutch Navy remained in port, ceding control of the North Sea to Britain.

Battle of Dogger Bank

The Dutch hoped for a quick negotiated peace with the backing of the League of Armed Neutrality.  They got some talk, but little else.  By August, 1781, the Dutch economy was near collapse with the end of all trade.  Out of desperation, the government attempted to sail a merchant fleet out of Texel.  Seventy merchant ships set sail, protected by seven Dutch ships of the line, and six smaller frigates. Admiral John Zoutman led the fleet.

For several days, the fleet escaped notice.  Then, in the early dawn hours of August 5th, Admiral Hyde Parker spotted the Dutch ships.  Parker had been escorting a British merchant fleet from the Baltic Sea back to England at the time.  The ships were passing through a shallow area of the North Sea known as Dogger Bank.

The 67 year old Parker had spent most of his adult life at sea, in the British Navy.  During the Seven Years War, he had served under then-Commodore Lord Howe in raids against the French coast.  In the most recent war, he had led fleets in both Europe and the Americas.  He was a highly experienced officer.

Admiral Parker quickly ordered his merchant ships to sail for the coast, and prepared to attack the Dutch fleet.  The British navy ships were not in the best condition.  They had been at sea for some time and were due for repairs.  Even so, this was the best opportunity the Dutch fleet had provided in the North Sea since the war began.  Parker could not pass up the chance to attack.

At the same time, Admiral Zoutman also saw the enemy and knew he would have to do battle with the British Navy.  He also ordered his merchant fleet back to Texel as he prepared to do battle with the British line.

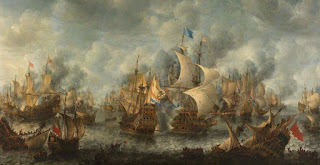
By 8:00 AM, both navies had formed lines of battle.  The two lines fired as they passed by each other, then turned around and went for another round.  Both sides took heavy casualties.  The attack continued for about three hours before the Dutch fleet turned and retreated back toward Texel.

Zoutman had given his merchant vessels enough time to withdraw and had also inflicted enough damage on the British fleet that it did not attempt to pursue.  The British fleet reported 104 sailors killed and 339 wounded. The Dutch reported 142 killed and 403 wounded.  However, some unofficial reports state that Dutch casualties were over 1000.  Although all of the ships sailed away from the battle, one of the Dutch ships sank before it could return to Texel.

Both sides claimed victory from the battle.  It was generally considered a draw, although it meant that Dutch trade continued to be halted for the foreseeable future.  Britain continued to control the North Sea.

Upon his return to Britain, Admiral Parker openly criticized the ministry for its failure to provide ships in good fighting condition, and blamed the failure to capture the Dutch fleet on that fact.  He was openly critical of Lord Sandwich and made no secret of the fact that he hated the Prime Minister, Lord North.

In an attempt to smooth over his hard feelings, King George offered Parker a knighthood and personally visited his fleet.  On that visit, Parker was rather abrupt with the king, telling him “I wish your Majesty better ships and younger officers.  As for myself, I am now too old for the service.”  

The 67 year old officer did not take another posting until after the government fell the following year.  A few months later, his older brother died, leaving a baronetcy to the admiral.  Parker should have stayed at home.  When the new government offered him a posting as commander-in-chief of the East Indies, he returned to sea in 1782.  His ship, the Cato was last seen in Rio de Janeiro in December.  After leaving port, it was never seen again.  The presumption was that it wrecked at sea and sank with all hands aboard.

British Leadership Remains Firm

Among the British leadership in London, support for the war was increasingly divided, but a majority still remained opposed to considering granting independence to the colonies in America. George III widely articulated this view, and saw it as his role to stand firm against any talk of allowing his empire to crumble.

The elections in 1780 had seen gains for the Rockinghamites, who increasingly supported American independence as a necessity so that Britain could focus on its wars with France, Spain, and now the Dutch Republic.  But Lord North’s Tories still held a majority in both houses, and continued to support prosecution of the war.

While the war continued to drain British resources, there was some reason for hope that it would not continue forever.  If Britain struggled with its finances, it was nothing compared to the struggles faced in France and in America.  The enemy seemed to be surviving financially on next to nothing, which could not continue much longer.  Further, General Clinton’s capture of Charleston in 1780 gave hope that the southern colonies would come back under control, even if some fighting continued there.  The defection of Benedict Arnold that fall further proved to many that the rebel coalition was on the verge of collapse.

The North Ministry still felt it had a secure working majority.  When Parliament opened in the fall of 1780, North attempted to replace the Speaker of the House of Commons with a much stronger supporter of the North ministry.  North’s choice, Charles Cornwall, won the election decisively, defeating the former speaker, Sir Fletcher Norton.

In early 1781, the ministry won votes supporting the war against the Dutch, as well as continued funding for the overall war effort.

Many opposition members even stopped attending Parliament, since there was little hope of any change.  In March, Lord Hillsborough wrote to William Eaden saying “The opposition is at present if not dead at least asleep: since I have been in parliament, I do not recollect a session half so quiet.”  Even an effort to conduct an investigation into loans raised for the war effort failed to pass a floor vote.  

At the end of May, as some news of setbacks in the south began to arrive, the opposition used it as an opportunity to grant the crown powers to negotiate a peace with the provinces in North America. A majority considered this an unnecessary display of weakness and voted down the motion.  In June, as news of the British victory at Guilford Courthouse arrived, along with the news of the devastating casualties that greatly weakened Cornwallis’ army, opposition leader Charles Fox tried again.  As before, the motion failed.

Mediation Offers

Even if Parliament remained on  board, in order to continue the war, Britain had to do what it could to keep even more European powers from lining up against it.  France and Spain were traditional enemies of Britain at this time, but in earlier wars, Britain usually had an alliance with other countries who took some pressure off Britain itself.  Prussia and Russia were among these.  Prussia was part of the Holy Roman Empire, which included almost all of the German-speaking states.  Its powerful armies had been a key partner with Britain in the Seven Years war.  In this war, however, most of Europe was sitting out the war.  If Britain could convince some of these other powers to go to war with France and Spain, those countries would be unable to focus on Britain.

Unfortunately, Britain could not get a fight started, and even had to worry about its traditional allies lining up against it if it could not respect their neutrality. Maria Theresa, former Empress of the Holy Roman Empire was focused on keeping Europe from plunging into a new war.  Her title as Empress vanished when her husband died in 1765, and her son Joseph II became the new emperor.  Maria Theresa, however, remained a respected power on her own. I mentioned in an earlier episode how she had managed to thwart a war in 1779 when her son Emperor Joseph and Federick the Great of Prussia almost went to war over control of Bavaria.

Had there been a war at that time, France would have been treaty-obligated to go to war with Prussia again.  This would have been to Britain’s great benefit.  But Maria Theresa kept the peace, and France could continue its focus on Britain.

Maria Theresa also hoped to broker a peace to end Britain’s war with France and Spain.  Although she offered to mediate, none of the powers were willing to take her up on the offer. She sent diplomats to London, Paris, and Madrid, trying to convince ministers to end the war.  She even lobbied her daughter, Marie Antonnette to use her influence in Versailles to encourage negotiations. None of these powers wanted to insult such a powerful leader, but they also did not see a negotiated peace in their self interest. 

When the empress died in 1780, the danger of war in central Europe once again became more likely.  Other leaders also sent out proposals for a negotiated peace, offers came from Catherine the Great of Russia, and King Ferndinand of Naples-Sicily.

Maria Theresa had not been a fan of the Revolution in America, nor of revolutions generally.  It was hard enough to keep the royal houses of Europe from going to war with one another.  It was so much worse when the people rose up against their own leaders to start a war.  

After her death, her son, Emperor Joseph, seemed to have a little more sympathy for the Americans.  For starters, he referred to them as “Americans” in his correspondence, at a time when most other heads of state were referring to them simply as “rebels”.  In a letter to Catherine the Great of Russia, Joseph seemed to sympathize with the poor treatment of the American colonies by Britain and said that thought a British victory was impossible.  

In 1777 Joseph had traveled to Paris to visit his sister, Queen Marie Antonette, and attempted to set up an unofficial meeting with Benjamin Franklin while there.  British intelligence managed to prevent the meeting.  Even so, rumors of the meeting trickled through the courts of Europe.

Although he continued to remain neutral, Joseph regularly commented in private correspondence that he thought the Americans would win and that the continuing war in America was proving disastrous for Britain.

Thinking that Joseph might be amenable to some sort of involvement, the Americans sent William Lee to Vienna in 1778.  At that time though, Maria Theresa prevented any officials from meeting with the would-be ambassador.  Recognition of Mr. Lee would have been tacit recognition of American independence, and would have enraged Britain.

Joseph was not simply a disinterested observer though.  The capital of the Holy Roman Empire was Vienna, in Austria.  Joseph inherited the Crown as King of Austria from his mother, Maria Theresa, on her death in 1780.  Austria today is a landlocked country, but in 1780, it held a coastal presence in what is today Belgium.  At that time, it was called the Austrian Netherlands.

The port at Ostend in the Austrian Netherlands became the main neutral port along the west coast of Europe, once France, Spain, and the Dutch were at war with Britain.  The result was a booming trade for Austria.  All sorts of merchant ships wanted to fly a neutral flag that would protect them from enemy navies and privateers.  Between 1778 and 1780, Ostend saw a 700% increase in shipping.  Profiteering in merchant goods as well as war supplies greatly enriched Austrian trade.

Seizure of Den Earston

This new transatlantic trade under the Habsburg flag inevitably led to a controversy.  On August 20, 1781, a Massachusetts privateer called The Hope, seized Den Eersten, a merchant ship that had left Ostend under the Habsburg flag, headed for the West Indies.

Daniel Darby, the captain of The Hope, sailed both ships back to Boston for review by a prize court.  The court met on September 6 to determine whether the seizure was a legal capture of an enemy vessel, or an illegal taking of a neutral ship.

Darby argued that the ship was clearly British and was carrying British made goods.  The Captain of the captured Den Eersten, Peter Thompson, countered that there was no evidence that this neutral flagged ship was British, or that anything on it was British.  This was all just made up by Darby to steal his ship and its contents.

The court determined that the ship was owned by an Ostend firm, but also found correspondence from English merchants that established this was just an effort to get around the French blockade.  The case lingered until the end of November, when the court held that the ship was that of a neutral, but that its contents were English goods.

This split decision really did not satisfy anyone since it was not normal practice to separate a ship from its contents.  If the ship really was from a neutral country, the privateer had no authority to take the ship in the first place and then its contents.  The case was appealed to a US court in Philadelphia, which did not hear the appeal until 1782.  The appeals court found that the ship’s cooperation with English merchants violated its status as a neutral and could therefore be seized.

This ruling essentially endangered all ships flying under the Habsburg flag. The British used the incident to get the neutrals on their side, arguing the Americans had proven themselves simply to be pirates.  Benjamin Franklin tried to turn the decision in America’s favor by trying to convince Austrian officials to send a diplomat to America to deal with future disputes.  This would have created at least an unofficial diplomatic relationship with America.

In the end, the Austrians did not do anything either way on the matter.  They did not want to show a bias toward either party, hoping still to sit as a mediator of the war between Britain and America.

Congress of Vienna

Diplomats continued their efforts to negotiate an end to the war.  France seemed to be the most opposed to this effort, thinking it had the advantage over Britain. But by the end of 1780, with its finances in ruins, and the Americans just begging for more of everything, France seemed more amenable to discussion.  France also feared Spain might be getting cold feet after their efforts to retake Gibraltar had come to nothing.

Joseph’s diplomats proposed a Congress of Vienna, to take place in the summer of 1781.  One of the biggest issues was how the Americans would be represented.  Britain would not recognize any diplomat from the Continental Congress, which it argued was an illegal body.  Negotiators suggested that each colony might send its own diplomat.  That, however, was a nonstarter for the Americans, who did not want their divided interests to be exploited at a conference.

In May of 1781, diplomats sent out their proposal for a conference.  The Americans would be invited to work out a separate peace between them and Britain.  All parties would agree to a one-year armistice. British officials bristled at the idea of inviting the Americans.  France disliked the idea of the armistice since it only gave Britain time to regroup and rebuild its forces.  Spain refused to consider anything that would not put Gibraltar as a main point of negotiation.

In the end, everyone ended up rejecting the terms, and the conference altogether.  Instead, all parties wanted to wait and see the 1781 fighting season results before making any more efforts at a negotiated peace.  Of course, all those efforts would fade away after the events in Yorktown later that fall.

Next week: we return to Connecticut, as General Benedict Arnold makes one final trip to his home state to burn a town and slaughter some prisoners.

- - -

Next Episode 295 New London (Available January 21, 2024)

Previous Episode 293 Isaac Hayne

 Contact me via email at mtroy.history@gmail.com

 Follow the podcast on Twitter @AmRevPodcast

 Join the Facebook group, American Revolution Podcast 

 Join American Revolution Podcast on Quora 
 
Discuss the AmRev Podcast on Reddit

American Revolution Podcast Merch!

T-shirts, hoodies, mugs, pillows, totes, notebooks, wall art, and more.  Get your favorite American Revolution logo today.  Help support this podcast.  http://tee.pub/lic/AmRevPodcast

American Revolution Podcast is distributed 100% free of charge. If you can chip in to help defray my costs, I'd appreciate whatever you can give.  Make a one time donation through my PayPal account. You may also donate via Venmo (@Michael-Troy-20) or Zelle (send to mtroy1@yahoo.com)


Click here to see my Patreon Page
You can support the American Revolution Podcast as a Patreon subscriber.  This is an option making monthly pledges.  Patreon support will give you access to Podcast extras and help make the podcast a sustainable project.

An alternative to Patreon is SubscribeStar.  For anyone who has problems with Patreon, you can get the same benefits by subscribing at SubscribeStar.

Help Support this podcast on "BuyMeACoffee.com"


Visit the American Revolution Podcast Bookshop.  Support local bookstores and this podcast!


Signup for the AmRev Podcast Mail List

* indicates required

Further Reading

Websites

Battle of Dogger Bank: https://threedecks.org/index.php?display_type=show_battle&id=129

Battle of Dogger Bank, 1781: https://sailsofglory.org/showthread.php?5296-The-Battle-of-the-Dogger-Bank-1781

The Battle of the Doggersbank – 5 August 1781: https://morethannelson.com/battle-doggersbank-5-august-1781

Anglo-Dutch Wars: https://www.heritage-history.com/index.php?c=resources&s=war-dir&f=wars_anglodutch

Anglo-Dutch Wars: https://geheugen.delpher.nl/en/geheugen/pages/collectie/Nederland+en+Engeland%3A+de+band+tussen+twee+naties/De+Engels-Nederlandse+oorlogen

The Netherlands and the American Revolution https://www.amrevmuseum.org/the-netherlands-and-the-american-revolution

Morgan, Kenneth. “Anglo-Dutch Economic Relations in the Atlantic World, 1688–1783.” Dutch Atlantic Connections, 1680-1800: Linking Empires, Bridging Borders, edited by Gert Oostindie and Jessica V. Roitman, Brill, 2014, pp. 119–38. JSTOR, http://www.jstor.org/stable/10.1163/j.ctt1w8h3c9.11

Scott, H. M. “Sir Joseph Yorke, Dutch Politics and the Origins of the Fourth Anglo-Dutch War.” The Historical Journal, vol. 31, no. 3, 1988, pp. 571–89. JSTOR, http://www.jstor.org/stable/2639757

Free eBooks
(from archive.org unless noted)

Christie, Ian R. The End of North's Ministry 1780-1782, Macmillan & Co. 1958 (borrow only).

Edler, Friedrich The Dutch Republic and the American Revolution, Baltimore: The Johns Hopkins Press, 1911. 

Piggott, Francis Taylor & Omond, George W. T. Documentary history of the armed neutralities, 1780 and 1800, together with selected documents relating to the War of American Independence 1776-1783 and the Dutch War 1780-1784, London University Press, 1919.

Books Worth Buying
(links to Amazon.com unless otherwise noted)*

Jones, J.R. The Anglo-Dutch Wars of the Seventeenth Century, Longman, 1996.
(borrow on Archive.org

Namier, Lewis The History of Parliament: The House of Commons 1754-1790, History of Parliament Trust, 1964 (borrow on archive.org). 

Schama, Simon Patriots and Liberators: Revolution in the Netherlands, 1780-1813, Knopf, 1977. 
(borrow on Archive.org

Simms, Brendan Three Victories and a Defeat: The Rise and Fall of the First British Empire, Basic Books, 2008. 

Singerton, Jonathan The American Revolution and the Habsburg Monarchy, Univ. of Va Press, 2021 (on archive.org). 

* As an Amazon Associate I earn from qualifying purchases.


Sunday, April 10, 2022

ARP244 Russia and the League of Armed Neutrality


Over the last few episodes, I’ve focused on how Britain has been struggling with a larger war against European powers.  The rebellion of its American colonies raised a sense in Britain’s enemies that it might be in a state of weakness. France in 1778, and Spain in 1779 went to war against Britain.  Other countries also began smelling blood.  Although not ready to go to war, they did hope to take advantage of the situation.

European Discord

Europe at this time was dominated by a few families of aristocrats that intermarried with one another.  They made whatever deals they had to do to maintain alliances of national security.  They were also always ready to pounce on a neighbor in a moment of weakness in order to add to their own real estate when possible. 

When various European powers went to war, diplomatic efforts turned to bringing allies into the war, or at least keeping potential enemies from joining the war.  Alliances shifted with some regularity, but a general trend over the prior couple of centuries was that Protestant countries generally squared off against Catholic countries.  So Catholic France, Spain, and the Austro-Hungarian Empire, tended to ally, along with smaller papal states in the Italian peninsula. Protestant Britain tended to ally with the Netherlands, Denmark (which included Norway) and Sweden (which included Finland), and Prussia and the smaller German states, . 

There were exceptions, of course.  Catholic Portugal often allied with Britain because Catholic Spain tended to be an enemy.  Nordic countries, including Sweden and Denmark sometimes allied with Catholic countries in order to fight their neighbors in the German states.  Russia tended to be all over the place, changing alliances regularly, and sometimes in the middle of a war.  It’s also important to remember at this time that wars were not the massive bloodbaths that we see beginning with the Napoleonic era.  

In the 18th Century, wars were fought between relatively small professional armies that did not involve the much larger civilian population.  Most of these people were peasants, who really didn’t care that much what distant monarch claimed sovereignty over them.  War might bring destruction, pillaging, and rape, but since all armies did that, including the one that ruled over the people, peasants were more concerned that the war would end quickly so they could get back to trying to survive.  If a different king took their same taxes and rents, that was not much of a concern.  Armies were made up of paid professional soldiers who were looking to conquer other paid professional soldiers.  The monarchs of Europe paid for these professional armies to protect their real estate and look to conquer others, like some giant game of Risk.

The 18th century wars in Europe and the constantly-shifting alliances could be a whole podcast by itself.  I only mention all this by way of background for the war that broke out in the 1770’s.  Spain and France were at war with Britain, but other European powers were mostly trying to stay out of the fight. War was an expensive proposition, so letting other countries fight each other while you built up your money and resources, would give you an advantage against those potential adversaries in the next war. One of the key countries that maintained its neutrality in this war was that of Russia, ruled by Catherine the Great.

Catherine the Great

Catherine II of Russia, also known as Catherine the Great, was like all the other European leaders, continually shifting alliances for whatever gave her country the greatest benefit..  Catherine had been born in the German state of Prussia, today part of Poland, as Princess Sophie.  Her father was Christian August, Prince of Anhalt-Zerbst, one of many tiny German states.  Since her father was not the first born son, his older brother ruled and Christian embarked on a military career.  These smaller states typically served in the larger Prussian Army, which usually provided military protection to the smaller German states.

Catherine, age 16
By the time of Sophie’s birth in 1729, her father was a major general.  Eighteen months earlier, the 37 year old general had married the 15 year old Princess Joanna Elizabeth, also from a minor noble family.  The couple lived a modest but comfortable life.  Joanna showed little interest in her daughter, allowing her to be raised by servants almost from birth. 

But the couple did have family connections.  Pretty much all royal marriages took place to other royals, meaning that almost all of them were interrelated in some way.  It was a strategy to keep wealth and power within the extended family.  Lower ranking royals used marriage as a way to improve their family’s status, wealth, and power.  It was also unusual to marry someone from your own country.  Marriages were a strategic way to maintain alliances. If your child married the child of your rival, perhaps he would be less interested in waging war against his grandchild.

By the time Princess Sophie was eight years old, her mother began shopping her around the great houses of Europe in search of a potential husband.  They didn’t have much luck.  The family lacked wealth and position.  A military general living in a townhouse was not impressive to the great royal families of Europe.  Even so, her mother worked to find Sophie an impressive match that would enhance the family’s stature.  By 1739, Sophie was ten years old and still without a fiancé.  

Peter III of Russia
Her mother went to visit her brother, Sophie’s uncle Adolf that year.  Adolf had recently become the guardian of eleven year old Charles Peter Ulrich, who was the only living grandchild of Peter the Great of Russia, and also a potential heir to the throne of Sweden.  The boy’s prospects made him a major catch for anyone looking for a strategic marriage.  Charles and Sophie were second cousins.  Sophie thought the boy was childish and ugly, and wanted nothing to do with him.

That, of course, was irrelevant.  The children would have no say in who they married.  Johanna began corresponding with the boy’s aunt, Grand Duchess Elizabeth Petrovna of Russia.  Elizabeth, daughter of Peter the Great.  Elizabeth’s mother was Peter’s maid. She was illegitimate, but Peter later married her mother and tried to legitimize her birth.  The result was she had a hard time finding a spouse among the great families despite being daughter of the Tsar. Elizabeth had been engaged to Johanna’s brother.  He died before they could be married.  Johanna used that past relationship to begin correspondence with Elizabeth about a possible match between Johanna’s daughter Sophie, and the childish and ugly Charles Peter Ulrich that Sophie hated, 

A few years after the two children met, Elizabeth of Russia, through a whole series of deaths, coups, and other machinations too complex to get into here, assumed the throne and became Empress of Russia in 1741. She brought the boy to Russia and proclaimed him heir to the Russian throne.  He would go by the name Peter, and renounced his claims to the Swedish throne.  He converted to the Eastern orthodox religion and began to prepare to take the throne upon his aunt’s death.

Meanwhile, Sophie’s mother, Johanna continued to encourage Elizabeth to agree to a marriage to the heir-apparent of the Russian throne. Sophie’s prospect of marriage grew a bit when her father inherited his family’s principality upon the death of the last of his older brothers in 1742.  Probably more important was the support of the new King of Prussia Frederick II, later known as Frederick the Great.  Frederick wanted the marriage in order to strengthen the relationship between Russia and Prussia.  He was trying to pull Russia away from an alliance with the Austro-Hungarian Empire, Prussia’s enemy.

Empress Elizabeth
Sophie’s mother overplayed her hand and ended up being expelled from Russia as an accused spy for Prussia.  Elizabeth, however, had taken a liking to Sophie. With ministers from both Prussia and France encouraging the match as a way to improve international relations, Elizabeth approved the marriage.

In 1744, Sophie, by this time fifteen years old, moved to Russia, and prepared to become the wife of Peter. She took the name Catherine, converted to the Eastern Orthodox religion, and began learning how to speak Russian.  The following year, the sixteen year-old Catherine and the seventeen year-old Peter were married.

By many accounts, including Catherine’s he still despised her new husband and refused to consummate the marriage.  Both husband and wife began taking other lovers almost immediately.  

While the marriage relationship was, at best, strained. Catherine did work hard to build a good relationship with Empress Elizabeth.  Even this relationship was tactical, rather than out of any affection.  After four years of marriage, Catherine was accused of plotting with her husband to overthrow Elizabeth and take the Russian throne before the Empress passed away from natural causes.

The plot was crushed and kept relatively private.  Afterwards, however, Elizabeth pressured Catherine to produce an heir, likely with the intention that she would leave her throne directly to their child, and bypass Peter and Catherine entirely.

It took a few more years, but Catherine eventually had two children, a boy and a girl.  Peter was deemed to be the father, although there is great doubt as to whether this was really the case.  But the children were accepted as legitimate, and the boy, Paul, took his place in line for the throne.  Elizabeth took the child from Catherine and had the baby raised in her own household by nannies and tutors.

In 1762, the Empress Elizabeth died.  Peter and Catherine became the new Emperor and Empress of Russia.  At the time Russia was embroiled in the Seven Years War.  

Now remember, the whole point of marrying the Prussian Catherine to Peter was to cement the Prussia-Russia alliance.  That, however, did not take place.  Russia allied with Austria, France, Spain, and a few other powers against Prussia, Britain, Portugal, and others.  So, Russia was at war with Prussia and had captured Berlin.

Upon his ascension to the throne, however, Peter favored Prussia and was a huge fan of Frederick the Great.  He ended up switching sides and allying Russia with Prussia, and returning Berlin to Frederick.

Catherine, of course wanting to support her husband on this important matter of state, accepted this decision.  Of course, I’m joking.  Catherine deeply opposed her husband’s decision to ally with Prussia.  Following the truism that well-behaved women seldom make history, she began plotting to overthrow her husband.  After less than six months on the throne Catherine used the issue of the Prussian alliance to get the political support she needed to take the throne for herself, and have her husband thrown in jail.  Shortly thereafter, Peter died in his jail cell.  It was officially ruled a stroke, but most people believe he was murdered.

So, on the issue of opposing the alliance with Prussia, Russian leaders put the daughter of a Prussian general and an accused Prussian spy, in command of Russia.  Her son Paul was eight years old at the time, and had not really lived with his mother ever.  Catherine continued to leave the child’s upbringing to others while she ran the country.

In 1772, Paul turned eighteen and decided it was time to take over from his mother.  Catherine was having none of it.  She managed to keep him in the shadows while she continued to rule Russia as its only leader.

Catherine took efforts to modernize Russia and to extend its commerce.  Her position of power and her familial relationship to the great powers of Europe gave her some influence over international affairs.  

Russo-Turkish War

When the war began between Britain and its colonies, the last thing Russia wanted was to get involved in another war.  Catherine had rejected entreaties from George III of Britain to hire Russian soldiers to assist in the suppression of the American rebellion. 

End of Russo-Turkish War, 1772
At the time, Russia had just ended the Russo-Turkish War.  That war began in 1768, after Russian Cossacks in Poland crossed into Ottoman territory in what is today Ukraine.  The Ottomans took the border crossing by Russian soldiers as an act of war.  Perhaps Russia should have learned at the time that invading Ukraine was a bad idea, but apparently not a lesson that they took to heart.

I won’t go into all the details, but the war spread through the Caucuses and into the Mediterranean Sea, leading to about six years of bloody fighting.  It also led to the partition of Poland in 1774, causing officers like Thaddeus KoÅ›ciuszko and Casimir Pulaski to flee the country and eventually head to America.

Russia was generally regarded as successful in the war, but had been left in debt and exhausted as a result of it.  When Britain came calling with an offer to join another war a year later, Catherine was not interested.  George would have to satisfy his military needs with Hessians instead. As an interesting aside, Catherine's brother, Frederick Agustus had become prince of Anhalt-Zerbst, the home of their father.  He did agree to rent some of his soldiers to George III and many of them went to America to fight as Hessians.

Merchant Shipping

Russia had built up an active trade with many European countries by the 1770’s.  Russian serfs produced iron that was feeding Britain’s industrial revolution.  Other Russian products were sent by ships to trade with the Netherlands and France.

While Russia and the other neutral powers were trying to avoid being drawn into war, they also did not want to end commerce.  Other northern powers, such as Denmark and Sweden all wanted to send commercial shipping through the English Channel to countries in southern Europe.  The British Navy did not want these neutral countries selling items to its enemies if those goods could benefit enemies’ war effort.  So British ships had no compunctions about boarding neutral merchant ships in open waters and seizing any goods they deemed to be contraband.  Russia also sent goods on British ships, which were being seized by privateers operating in European waters.

At this time, the most annoying neutral country for Britain was not  Russia, It was the Netherlands.  It was sending military goods to its island colonies in the West Indies.  There, American ships were purchasing war supplies and other necessities, which they would run back to North America for use in the ongoing war with Britain.

Charles Fielding
To combat this trade, Britain tried to compromise with the Netherlands, allowing it to continue to send general trade goods to America, but not military supplies.  The Netherlands rejected the offer, under the principle of you're not the boss of me, and I can do what I want - arguing it had every right to send military goods to its own colonies in the West Indies and Britain had no authority to prevent them.  If Americans were then smuggling those goods into America, that was Britain’s problem.

With no compromise possible, Britain informed the Netherlands that its navy would stop and search any Dutch vessels in the English Channel.  In January of 1780, a small British fleet in the Channel commanded by Commodore Charles Fielding, confronted a fleet of Dutch merchant ships and demanded the Dutch permit them to board and search the ships.  The Dutch commander refused.  Fielding ordered his ships to open fire, after which the Dutch almost immediately surrendered and the ships were taken as prizes to a British port.

The incident set off a diplomatic flurry as Dutch officials protested the British navy’s attack on neutral merchant ships.  It also gave Russian Empress Catherine the incident she needed to announce Russia’s new Declaration of Armed Neutrality.

League of Armed Neutrality

Russia saw the growing discord as a chance to increase Russian influence.  Catherine announced that Russia would resist any efforts by foreign ships to search Russian-flagged vessels at sea.  Russia entered into a treaty with Denmark and Sweden to cooperate in resistance to searches or any other interference with merchant vessels in the open sea.  It further demanded that the countries at war, Britain, France, and Spain, agree to respect these rights.

The principles asserted by the treaty were that neutral vessels could navigate freely between ports and along the coasts of the nations that were at war.   Even if neutral vessels carried property belonging to countries that were at war, they could be carried freely without interference, with the exception of contraband items (such as arms or ammunition).  It would protect items such as naval stores or ship’s timber which might be put to use supporting a belligerent country’s war effort, but also had legitimate peacetime uses.  A belligerent could blockade a port to prevent commercial traffic, but this could only be respected if there was a clear naval force blockading a port.  Roving vessels with intent to search or seize neutral merchant ships could not claim to be part of a blockade.

Spain and France accepted the principles laid out in the treaty right away.  Britain received the declaration from the Russian ambassador on April 1, 1780.  Britain agreed as a matter of policy to comply with some of the principles, but would not recognize any of them as international rights.  Britain believed that its navy was its most powerful weapon against France and Spain.  Giving up its power to interdict trade would hamper its war effort.

Challenging British resistance to the declaration, Russia announced that its League of Armed Neutrality would deploy a fleet of 84 Russian, Danish, and Swedish warships to keep open the seas to neutral merchant vessels.  If the British attacked these ships, it could lead to open war against the League, something that Britain really could not afford at the time.

The end result was that the League further isolated Britain from the rest of Europe.  The Netherlands attempted to join the League, but Britain ended up declaring war on the Netherlands before they got the chance to join, thus taking them out of the category of being a “neutral.”  Over the next few years, the other major powers of Europe joined the League, adopted its principles, and to some extent, contributed to its enforcement.  Prussia, Austria and Portugal would join the League in 1781.  Even Russia’s rival, the Ottoman Empire joined in 1782, and the powers that make up what is today southern Italy joined in 1783. 

The result was that virtually all of Europe was either at war with Britain or part of the league that was hostile to Britain’s naval policies.  Britain was finding itself even further isolated and subject to even greater threat from its lack of allies.

Next week: Britain opts to expand the war even further with its decision to attack Spanish outposts in Central America.

- - -

Next Episode 245 San Juan Expedition 


 Contact me via email at mtroy.history@gmail.com

 Follow the podcast on Twitter @AmRevPodcast

 Join the Facebook group, American Revolution   Podcast: https://www.facebook.com/groups/132651894048271

 Join American Revolution Podcast on Quora 


American Revolution Podcast Merch!

T-shirts, hoodies, mugs, pillows, totes, notebooks, wall art, and more.  Get your favorite American Revolution logo today.  Help support this podcast.  http://tee.pub/lic/AmRevPodcast


American Revolution Podcast is distributed 100% free of charge. If you can chip in to help defray my costs, I'd appreciate whatever you can give.  Make a one time donation through my PayPal account. You may also donate via Venmo (@Michael-Troy-20), Zelle, or popmoney (send to mtroy1@yahoo.com)


Click here to see my Patreon Page
You can support the American Revolution Podcast as a Patreon subscriber.  This is an option making monthly pledges.  Patreon support will give you access to Podcast extras and help make the podcast a sustainable project.

An alternative to Patreon is SubscribeStar.  For anyone who has problems with Patreon, you can get the same benefits by subscribing at SubscribeStar.

Help Support this podcast on "BuyMeACoffee.com"


Visit the American Revolution Podcast Bookshop.  Support local bookstores and this podcast!


Signup for the AmRev Podcast Mail List

* indicates required

Further Reading

Websites

Charles Fielding https://morethannelson.com/officer/charles-fielding

Kaplan, Herbert H. “Observations on the Value of Russia’s Overseas Commerce with Great Britain during the Second Half of the Eighteenth Century.” Slavic Review, vol. 45, no. 1, Association for Slavic, East European, and Eurasian Studies, 1986, pp. 85–94, https://doi.org/10.2307/2497923

Armed Neutrality https://www.encyclopedia.com/history/encyclopedias-almanacs-transcripts-and-maps/armed-neutrality

League of Armed Neutrality https://www.encyclopedia.com/history/modern-europe/british-and-irish-history/league-armed-neutrality

Carpenter, William S. “The United States and the League of Neutrals of 1780.” The American Journal of International Law, vol. 15, no. 4, American Society of International Law, 1921, pp. 511–22, https://www.jstor.org/stable/2188285

Griffiths, David M. “An American Contribution to the Armed Neutrality of 1780.” The Russian Review, vol. 30, no. 2, [Wiley, Editors and Board of Trustees of the Russian Review], 1971, pp. 164–72, https://www.jstor.org/stable/127896

Kulsrud, Carl J. “Armed Neutralities to 1780.” The American Journal of International Law, vol. 29, no. 3, 1935, pp. 423–47, https://www.jstor.org/stable/2190419

Armed Neutralities - League of the armed neutrality https://www.americanforeignrelations.com/A-D/Armed-Neutralities-League-of-the-armed-neutrality.html

Free eBooks
(from archive.org unless noted)

Catherine, II, Memoirs of Catherine the Great, New York: Tudor Publishing Co. 1935 (borrow only) 

Haukeil, Henry A. and Tyrrell, H. The History of Russia from the foundation of the Empire to the War with Turkey in 1877–78, Volume 1 (London: The London Printing and Publishing Co. 1879.  

Books Worth Buying
(links to Amazon.com unless otherwise noted)*

Alexander, John T. Catherine the Great: Life and Legend, Oxford Univ. Press, 1988 (or read on archive.org). 

.Almedingen, E. M. So dark a stream; a study of the Emperor Paul I of Russia, 1754-1801, Hutchinson & Co. 1959 (or read on archive.org).

De Madariaga, Isabel, Catherine the Great: a short history, Yale Univ. Press, 1991 (or read on archive.org).

De Madariaga, Isabel. Britain, Russia, and the Armed Neutrality of 1780: Sir James Harris's Mission to St. Petersburg During the American Revolution, Yale Univ. Press, 1962. 

Kaplan, Herbert H. Russian Overseas Commerce with Great Britain During the Reign of Catherine II. American Philosophical Society, 1995. 

Massie Robert K. Catherine the Great: Portrait of a Woman, Random House, 2012

* As an Amazon Associate I earn from qualifying purchases.


Sunday, March 27, 2022

ARP243 Relieving Gibraltar


After Spain’s entry into the war with Britain in 1779, British leaders had to contend with the threat of a combined French-Spanish fleet right in their own backyard.  Only by luck had they avoided a full scale invasion of Britain that year.  The combined French and Spanish fleets continued to pose a grave threat to Britain.

Siege of Gibraltar

One of the main reasons that Spain had entered the war was to regain possession of several territories it had lost to Britain in earlier wars.  These included Minorca in the Mediterranean and the Floridas in the west indies.  But probably the most galling for Spain was British possession of Gibraltar, a mountainous region at the southern tip of Spain itself.  Britain used control of Gibraltar to regulate movement of ships in and out of the Mediterranean.

The Rock of Gibraltar
Britain, with the cooperation of the Dutch, had first captured Gibraltar in 1704, during the War of Spanish Succession.  It was a highly defensible position, having a castle built atop the rocky mountain, first fortified by the Moors a thousand years earlier.  Spain had regularly besieged Gibraltar many times during the middle ages, finally taking the castle.  They had controlled Gibraltar for several hundred years, before losing it to Britain.  

The 1713 Treaty of Utrecht gave Gibraltar to Britain, but the Spanish were never happy about an enemy country holding valuable real estate in what they regarded as part of mainland Spain. During the next Anglo-Spanish war in 1727, Spain launched an all-out attempt to dislodge the British, but were once again unsuccessful.  Following that war, Spain built a line of fortifications around Gibraltar, cutting it off from the rest of mainland Spain.  During the War of Jenkins’ Ear in 1739, the Spanish, once again, attempted to take back Gibraltar, but once again, the British defenses held.

When Spain signed the Treaty of Aranjuez in 1779 with France, marking its entry into the latest war with Britain, the first goal stated in that treaty was to take back Gibraltar once and for all. France agreed that it would not end the war until Spain took back Gibraltar.

As I said, for the prior half century, Spain had used its army to cut off all access from Gibraltar to the rest of Spain to the north.  But the dominance of the British Navy had allowed Britain to supply Gibraltar by sea, just as they did many of their island colonies.  The British left a relatively large garrison of regulars at Gibraltar, even in peacetime.  More than 5000 regulars occupied the rock before the war began.  That was more than 10% of the entire British army worldwide.  When the war in America began, George III, who was also elector of Hanover, deployed several regiments of Hanoverian soldiers to Gibraltar, in order to free up British regulars for America, but without reducing the overall garrison numbers at Gibraltar.

After Spain formed its alliance with France in April of 1779, it began its siege of Gibraltar in June.  Britain could still get its faster military ships past the naval blockade, but the larger and slower supply ships had more trouble getting to Gibraltar.  

Spanish Forces

Spain had deployed about 14,000 soldiers in the land to the north of Gibraltar.  Even with these superior numbers, Spain did not dare to attack the British fortifications.  They knew from experience that the terrain greatly favored the defenders.  The British had built up those fortifications, making use of the centuries-old defenses atop the Rock of Gibraltar, which rose more than a quarter mile above the ground, and defended all possible passages to the top with well-placed artillery.

Admiral Lángara
For Spain to take back Gibraltar, it would have to cut off all support from the sea.  To that end, Spain deployed Admiral Juan de Lángara.  The Admiral was from a prominent family from the Basque region of Spain.  His father had also been an Admiral.  Lángara entered his father’s profession at age 14, when he was commissioned as an ensign in 1750.  He had spent a quarter century proving his capabilities as a naval officer and slowly rising in rank through the Seven Years War, and afterwards leading several naval expeditions around the world, including three trips to the Philippines.

Lángara was part of the invasion fleet that the French and Spanish deployed against Britain in the spring of 1779.  Lángara managed to capture the British ship Winchcomb, the only British warship captured during that campaign. 

When most of the French and Spanish fleet went into winter quarters in Brest and Cadiz in late 1779, Lángara was tasked with maintaining the blockade against Gibraltar with nine ships of the line and two frigates.

British Relief Fleet

The Spanish blockade was having its intended effect.  By December 1779, six months after the siege began, the British-Hanoverian force of over 5000 soldiers at Gibraltar was running out of food and supplies.  Britain would have to find a way to get supplies to the army or risk losing the siege on account of starvation.

Admiral Rodney
To break the siege, London deployed a fleet under the command of Admiral George Brydges Rodney.  Rodney came from a minor aristocratic family.  His father, however, had made some bad investments, leaving the family impoverished.  Although his father had served as an army officer, Rodney entered the navy at age 14, where he could advance without having to purchase commissions.  

Through a combination of capable service, and the patronage of an influential relative, the Duke of Chandos, Rodney commanded the 60-Gun Eagle by the time he was in his early twenties.  This was not the same Eagle that would be Lord Howe’s flagship during the Revolution.  It was an earlier ship with the same name.

During the War of Austrian Succession, Rodney distinguished himself. He even managed to make some money capturing several valuable enemy ships.  By the time the Seven Years War began, Rodney was a Commodore.  He carried Major General Jeffery Amherst to America, and participated in the successful siege of Louisbourg.

He received promotion to admiral, and played a key role in the capture of Martinque, Grenada, and St. Lucia near the end of the war.  Following the War, the King granted him a Baronetcy.  He got married and settled onto a large country estate.  He won election to Parliament, and life must have seemed good.

Unfortunately, the cost of running for Parliament and the lifestyle costs of a gentleman ended up bankrupting the admiral.  He had hoped to secure an appointment as Governor of Jamaica, but failing that, Rodney had to flee to France in order to avoid creditors.  Just after France declared war with Britain in 1778, Rodney convinced a friend to lend him enough money to repay his creditors and return to Britain.  By this time he was an admiral of the white.

In December 1779 Rodney received orders to take command in the West Indies.  Before sailing there, however, he received secret orders to break the siege of Gibraltar by escorting a fleet of supply ships.

Rodney set out for Gibraltar with nineteen ships of the line in early January 1780.  A few days later, his fleet spotted the enemy. It turned out to be a Spanish supply fleet, defended by only one ship of the line. The British managed to capture the entire fleet, including the Spanish ship of the line, the Guipuzcoana.  Rodney renamed the ship the Prince William, after the King’s third son, who was serving as a midshipman with his fleet.

Battle of Cape St. Vincent

Following the capture of the Spanish supply fleet, Spanish officials got word of the British fleet headed for Gibraltar.  They deployed two fleets, one under Admiral Luis de Córdova and another under Admiral Lángara.  Now, you may ask yourself, why did I go through all the trouble of giving background on Lángara, but did not bother to give a background on Córdova?  The reason is that Córdova, once he learned of the size of the British fleet, turned around and went right back to Cadiz.  He did not even try to contest the attack.

Battle off Cape St. Vincent
Lángara, however, did not receive word about just how large a fleet he was facing.  He sailed his nine ships of the line westward, looking to do battle with the British relief fleet.  Just looking at the numerical difference, nine Spanish ships of the line against nineteen British ships, should give you an immediate idea of how lopsided this battle was.  

But the differences were even more stark than that.  Most of the British ships of the line were far larger than the Spanish ships, with more guns.  The Spanish fleet was also much slower.  Spain had done a poor job of keeping up the hulls on their ships, leading to rot and other problems which greatly slowed down the ships. A French admiral had noted that during the failed attempt to move a combined French-Spanish armada against Britain earlier that year, the fastest Spanish ship in the fleet was slower than the slowest French ship.  By contrast, the British ships had copper sheathing underneath, which made their ships even faster.  So, the British have twice as many ships, with much more firepower per ship, and a much faster fleet.

Admiral Lángara did not know any of this.  He only knew that a British fleet was advancing on his position and that he had orders to intercept it.  

On January 16, the two fleets spotted each other in the early afternoon.  They were just off the southern coast of Portugal, near Cape St. Vincent.  

The British Admiral Rodney was sick with gout at the time, and remained in his cabin during the entire action.  He gave advice from his bed, but his flagship captain Walter Young commanded the ship on deck. 

After the British and Spanish fleets confirmed sight of the enemy, both sides began to form a line of battle.  Quickly though, the Spanish realized just how outnumbered they were, Lángara ordered his ships to turn and make a run for it back to Cadiz.  The British, at first, hesitated to give chase, but after determining that the smaller Spanish fleet was not trying to lead them into a trap, they pursued the fleeing Spanish.

British pursue the Spanish fleet
Because the British ships were faster, they caught up with the enemy in only about two hours.  By 4:00 PM, three fastest British ships, the Edgar, Marlborough, and Ajax, opened fire on the slowest Spanish ships, the Santo Domingo.  It took them only about 40 minutes before they hit the powder magazine and blew up the ship, killing everyone on board, except for one crewman who managed to survive being blown into the water.

The Marlborough and Ajax, then sped off in pursuit of others.  The next slowest Spanish ship was the Princessa, who they bypassed in order to go after some of the faster ships.  The captains calculated, correctly, that other British ships could catch up and take the Princessa.  The Bedford soon caught up and engaged, forcing Princessa to strike her colors after about an hour of fighting.

By this time, it was getting close to dusk.  The British officers had to decide whether to call off the attack, in which case the remainder of the Spanish fleet would probably slip away, or whether they wanted to risk continuing the attack into the night.  A nighttime battle carried numerous more risks of being caught out of position, or misidentifying an allied ship and engaging in friendly fire.  In the end, the British thought that the risk was worth continuing the pursuit.  

Santa Maria Demasted
A few hours later, several British ships caught up with the Fenix, the Spanish flagship carrying Admiral Lángara.  During the ensuing firefight, Lángara was wounded.  More British ships arrived to pile on the attack. After the Bienfaisant shot away the Fenix’s mainmast, the Spanish flagship struck her colors and surrendered at around 2:00 AM on the morning of January 17.

Normally, in such a situation, the British would send over a prize crew to take control of the ship.  However, the Bienfaisant had a raging smallpox epidemic aboard.  The British captain informed the Spanish of this case and told them that rather than sending over a prize crew that might infect the Spanish crew, he would allow them parole to continue sailing their own ship.  They had to agree to remain with the British fleet, cease all hostile actions, and follow them back to a British port.  Rather than risk smallpox infection by a prize crew, the Spanish agreed to the terms.

Over the course of the rest of the night, British ships found and attacked the Diligente, the San Eugenio, and the San Julian.  After midnight, the British 80 gun ship the Alcide, caught up with the 74-gun Spanish Monarca.  Although smaller, the Monarca managed to get in a fortunate shot which toppled the Alcide's mainmast.  By that time though the smaller 32-gun British frigate Apollo had also entered the battle.  While probably too small to capture the Monarca on its own, it managed to keep the Spanish ship engaged until the 90-gun flagship Sandwich, sailing toward the sound of cannon fire, arrived on the scene at 2:00 AM and forced the Monarca’s surrender.

Entry into Gibraltar

By dawn, the British managed to capture six of the nine Spanish ships of the line. The remainder of the fleet managed to make it back to Cadiz. Even so, the British were not in the clear yet.  Prize crews aboard several of the damaged Spanish ships were close to the shore, with a strong breeze blowing them toward the land.  The British gave up on one of the badly damaged prize ships, the San Julián.  By late morning, they grounded the ship on the shore, and abandoned her.  

Relief Fleet at Gibraltar
The captured San Eugenio faced a similar fate.  According to British accounts they grounded the ship around noon.  However, the ship was not so damaged that the Spanish were able to recover the ship later and return it to service.  Spanish sources tell a different story, saying that the Spanish crew overwhelmed the British prize crew and retook control of the ship.

The victorious British convoy continued on to Gibraltar with the supply ships.  They chased away the few smaller Spanish ships guarding the coast near Gibraltar.  Even without any further naval opposition, entry into Gibraltar was difficult.  Gale-force winds battered the already battle damaged ships trying to make their way into Gibraltar while avoiding Spanish coastal artillery. Most of the fleet arrived at Gibraltar on January 19, two days after the battle. Although Rodney’s flagship, the Sandwich, made a stop in Tangiers before arriving on the 26th.

The supply ships saved the garrison at Gibraltar from starvation.  The additional food, munitions and over a thousand reinforcements would secure the fortress for at least another year.

During the relief, Spanish Admiral Córdova still had twenty-four French and Spanish ships of the line under his command at Cadiz. He could have pursued the smaller and damaged British fleet, but for reasons I don’t fully understand, he remained in port.

Aftermath

The result of the battle was a great victory for Britain. The Spanish lost over 2500 men killed, wounded, or captured, while the British suffered only 32 killed and 102 wounded.  

The British leadership celebrated news of the lopsided naval victory, and Admiral Rodney became the toast of London. Both Houses of Parliament passed resolutions thanking the Admiral for his service.  Admirals Lord Howe and Keppel honored him in public speeches.  The ministry offered a more tangible thanks in the form of a lifetime annual pension of two thousand guineas. Although Rodney remained at sea, eight months later voters in Westminster elected him to the House of Commons by the highest popular vote of that year’s election.  Two years later, after returning to Britain, Rodney would also receive the title of baron.

HMS Sandwich
The success of the fleet’s increased speed due to the use of copper sheathing led the navy to make greater use of that technology on more navy ships.  The technology had been around for decades, but officials had been uncertain that the improvements justified its cost.  The success at Cape St. Vincent convinced everyone of its value.

Meanwhile the Rodney remained with his fleet at Gibraltar as they completed repairs on their ships.  Once ready, the fleet sailed straight to the West Indies as planned.  We will pick up those exploits in a future episode.

The captured Spanish Admiral Lángara would receive parole and would return to duty in Spain rather quickly.  He received no blame for the loss, given that he was badly outgunned.  Rather, he was praised for his efforts in engaging the superior force.  He would continue in service with a new ship.  After the war, he would eventually become  Capitán General of the Spanish fleet, and later serve as minister of the navy.

His captured Spanish flagship, the Fenix was renamed the Gibraltar and entered British service.  The newly renamed 80 gun ship of the line would sail to Plymouth to be refitted and would remain in service for more than a half century, seeing extensive service throughout the Napoleonic wars.

Admiral Córdova, who avoided battle entirely, did not seem to suffer any backlash as a result.  Instead, a few weeks after the battle, the King appointed the 73 year old admiral the Director General of the Spanish Navy.  This appears to be one of those battles where all of the participants get a trophy.

The naval battle at Cape St. Vincent is sometimes called the Midnight battle since most of it was fought over the course of the night.  It gave the British a much needed decisive naval victory, which helped morale in London.  It also provided much needed relief to Gibraltar, which was stocked up to continue resisting the Spanish siege.

Next week, the British face a new challenge in the League of Armed Neutrals, and launch an attack against the Spanish forces in Central America.

- - -

Next Episode 244 Russia & League of Armed Neutrals

Previous Episode 242 Raids Around NY


 Contact me via email at mtroy.history@gmail.com

 Follow the podcast on Twitter @AmRevPodcast

 Join the Facebook group, American Revolution   Podcast: https://www.facebook.com/groups/132651894048271

 Join American Revolution Podcast on Quora 


American Revolution Podcast Merch!

T-shirts, hoodies, mugs, pillows, totes, notebooks, wall art, and more.  Get your favorite American Revolution logo today.  Help support this podcast.  http://tee.pub/lic/AmRevPodcast


American Revolution Podcast is distributed 100% free of charge. If you can chip in to help defray my costs, I'd appreciate whatever you can give.  Make a one time donation through my PayPal account. You may also donate via Venmo (@Michael-Troy-20), Zelle, or popmoney (send to mtroy1@yahoo.com)


Click here to see my Patreon Page
You can support the American Revolution Podcast as a Patreon subscriber.  This is an option making monthly pledges.  Patreon support will give you access to Podcast extras and help make the podcast a sustainable project.

An alternative to Patreon is SubscribeStar.  For anyone who has problems with Patreon, you can get the same benefits by subscribing at SubscribeStar.

Help Support this podcast on "BuyMeACoffee.com"


Visit the American Revolution Podcast Bookshop.  Support local bookstores and this podcast!


Signup for the AmRev Podcast Mail List

* indicates required

Further Reading

Websites

 Battle of Cape St. Vincent, 1780: https://www.britishbattles.com/war-of-the-revolution-1775-to-1783/battle-of-cape-st-vincent-1780

The Moonlight Battle off Cape St. Vincent – 16 January 1780, by Richard Hiscocks Jan 17, 2017: https://morethannelson.com/moonlight-battle-16-january-1780

George Brydges Rodney 1st Baron https://morethannelson.com/officer/george-brydges-rodney-1st-baron

Walter Young: https://morethannelson.com/officer/walter-young

The defeat of the Spanish fleet under Don Juan de Langara, by Sir George Brydges Rodney, Decr. 16th 1779, off Cape St. Vincent - most humbly inscribed to Prince William Henry: https://www.loc.gov/item/2004670175

Harvey, P. D. A. “An Account of the Siege of Gibraltar, 1779-83.” The British Museum Quarterly, vol. 23, no. 4, British Museum, 1961, pp. 93–95, http://www.jstor.org/stable/4422678

Free eBooks
(from archive.org unless noted)

The Naval Chronicle, Vol. 6, London: Bunny & Gold, 

Ancell, Samuel A Circumstantial Journal of the long and tedious blockade and siege of Gibraltar, from the 12th of September, 1779, ... to the 23rd day of February, 1783,  Liverpool: printed by Charles Wosencroft, 1784.  

Drinkwater, John A History Of The Siege Of Gibraltar(1779-1783), London: John Murray, 1861. 

Rodney, George Brydges Letter-books and order-book of George, lord Rodney, admiral of the White squadron, 1780-1782, Vol. 1, New York : Printed for the New York Historical Society, 1930. 

Wood, Walter Famous British War-ships, and their Commanders, London : Hurst and Blackett, Ltd. 1897. 

Books Worth Buying
(links to Amazon.com unless otherwise noted)*

Adkins, Roy Gibraltar: The Greatest Siege in British History, Viking, 2018. 

Dull, Jonathan R. The Age of the Ship of the Line: The British and French Navies, 1650-1815,  Univ. of Nebraska Press, June 1, 2009 

Falkner, James Fire over the Rock: The Great Siege of Gibraltar 1779-1783, Pen and Sword Military, 2009. 

McGuffie, Tom H. The Siege of Gibraltar, 1779-1783, Batsford, 1965 (or read on archive.org)

* As an Amazon Associate I earn from qualifying purchases.